Hello, world!
I've been
busy.On the one hand, I've been so busy preparing new units for my English students that I haven't had time to post.
On the other hand, I've found a wonderful distraction from preparing new units for my English students.
TaDa!

I have made my first foray in to the world of breadmaking, and it's been a success!
Ok, so I didn't knead the dough myself. But I
did borrow the breadmaker that did it from
Adrienne at
Happenscraps, etc. (Thanks, Adrienne!) And that counts for something, right?
Ok, fine. So it's a
lazy foray, but it's a foray nonetheless.
A
lazy foray. That sounds like a really bad dance move, doesn't it?
(Copyright Teri2010)Ok, so anyway, I have made two loaves of white bread, whole-wheat cinnamon rolls, and a loaf of
the best cinnamon-raisin bread I've ever had.

I'm even going to tell you how I did it, because I'm all generous like that.
First, I made a dough recipe I found on Food.com. (You can find the original post
here - thank you to the talented baker who posted it!) Here's the recipe:
Put the following ingredients into your breadmaker on the "dough" setting.
- 1 1/4 c warm water
- 2 tsp butter
- 3 c white flour
- 1 1/2 tsp salt
- 3 Tbsp sugar
- 1 1/2 Tbsp powdered milk
- 2 tsp yeast
*****Editor's note: The breadmaker peeps insist that you have to add the ingredients in the order listed...but I may or may not
have twice forgotten to add the little paddle that kneads the dough before I added the ingredients...and then I may or may not
have had to dig down to the bottom of the bowl-thingy to put it in, thereby stirring up the ingredients and messing up the layers. May or may not.
We can't be certain.
By the way, I didn't use breadmaker yeast - I was just guessing that you only knead that if you're baking the bread right in the breadmaker.
Get it?
Knead?Snort.
Anyway, I added all those ingredients, then turned that sucker on. Then I tried to find something else to do because I am oh-so-patient that way.
Oh look! A kitty!

Ok, so this is where it gets a little creative, because I've never done this before. After looking up some recipes for this stuff, I determined that I wanted to use the bread recipe I had tried and liked, and then just experiment with the raisin-cinnamon aspect.
This was truly an experiment, because everything I read said that add-ins make it rise more slowly, and that the sugar content, etc. causes all sorts of changes. I didn't have any issues, though.
Anyway, when it let out that
if-you're-gonna-add-something-add-it-now beep, I added half a cup of raisins.
***Editor's note: Do not add "two scoops" unless your scoops are around a quarter cup. I'm just saying...if you want some bread with your raisins, do not let Kellog's clever marketing put you on auto-pilot.Then, I let it go through its first rise in the breadmaker.
And then I waited again.
Oh look! A puppy!

Alright, so then it beeped, and I removed the dough and rolled it out to around 10" by 16".
Ok, so I actually froze the dough because I had to go out, then thawed it and rolled it out. Gosh, you're nosey.
I melted some butter (maybe 3 tablespoons) and slathered it all over the surface of the dough. Then, I used some leftover brown-sugar-and-cinnamon-concoction from the cinnamon buns of the other day, sprinkled that on, and rubbed it in a little for good measure. It was about 1/3 c of sugar with perhaps 1 tsp of cinnamon mixed in. Then, I took the cinnamon shaker and added a little more all over.
Next, I rolled up the loaf from the narrow side, pinched the ends closed, then tucked them under, and put the loaf in a greased loaf pan.
After letting it rise for 35 minutes, I baked it for another 35 at 350...
Et voila!

The most scrumptious cinnamon-raisin bread I've ever had!
Mmmmm.
"
Noooo, don't eat me!"
Shut up, bread.


 She carries herself with such grace, such poise, such...je ne sais quois.
 And of course, by "je ne sais quois", I mean that "why do you insist on humiliating me for your own amusement?" look.
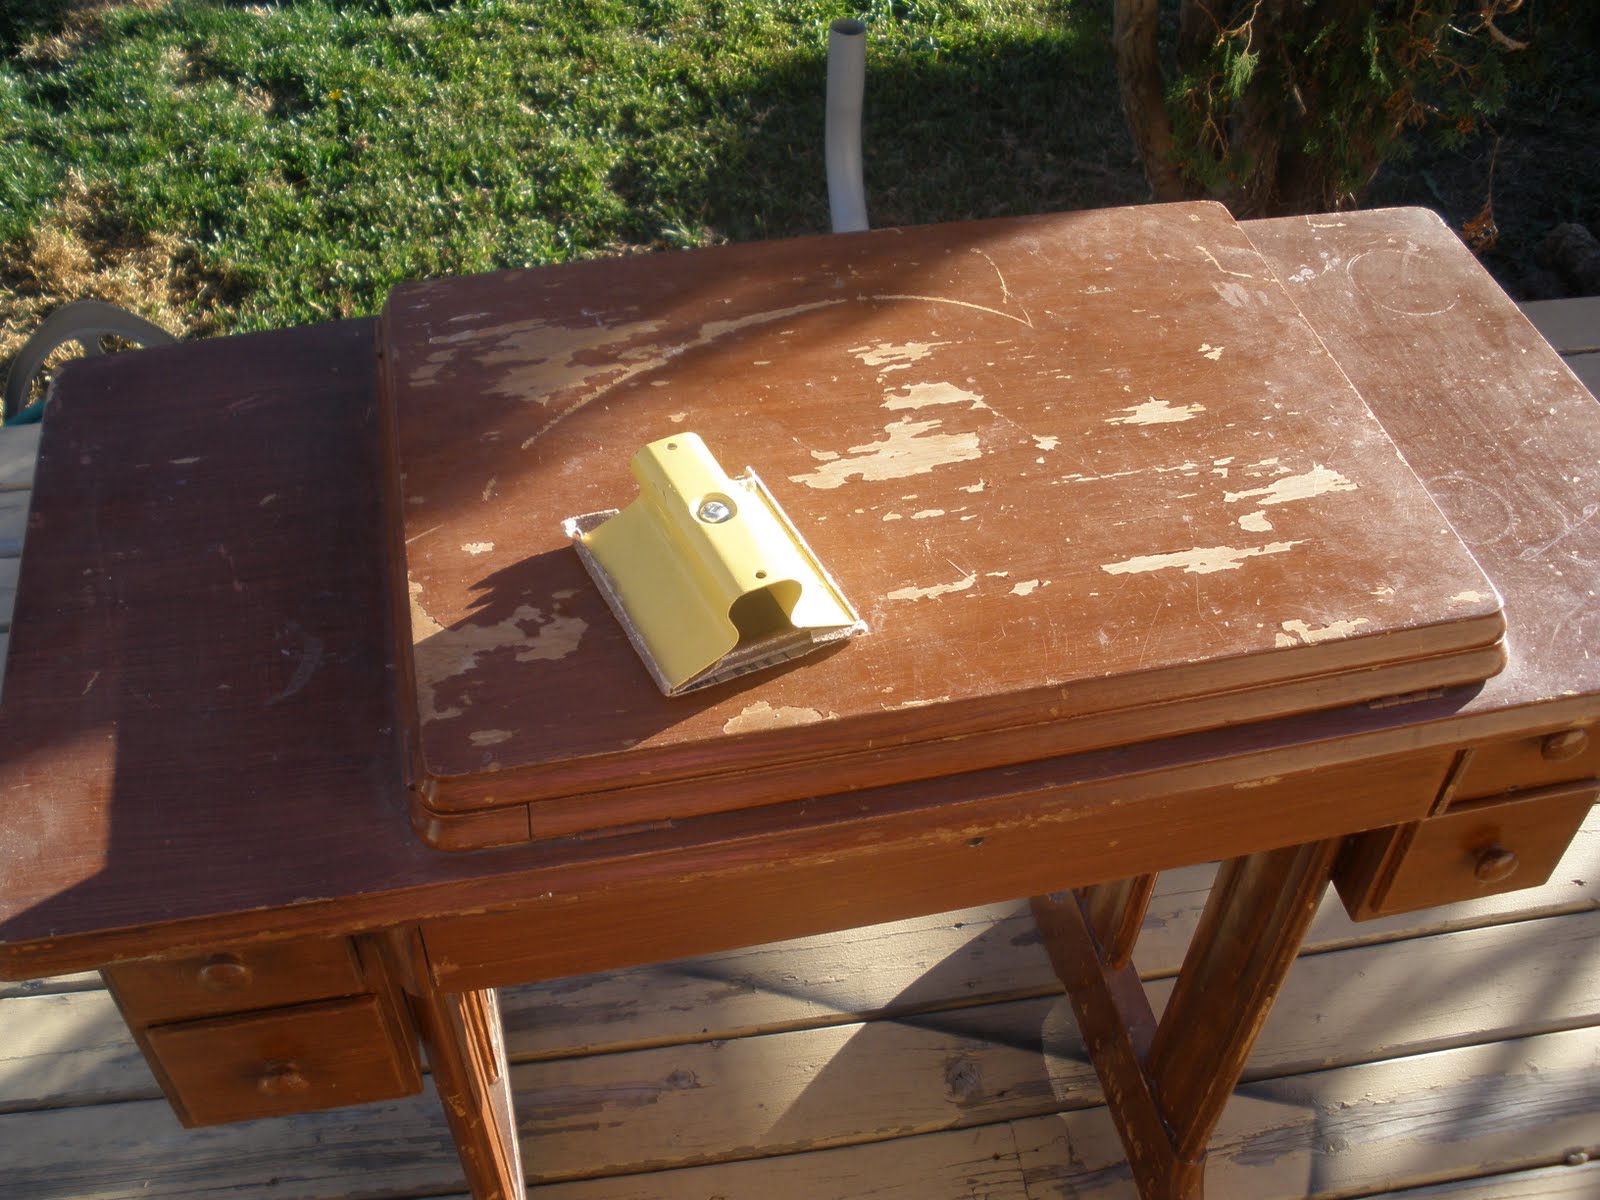 Oh wait...did I say candy-coated shell? I meant to say poorly-painted-this-awesome-baby-poo-colour shell.
 This paint came off way too easily. Seriously. It's like I did the original paint job myself.
 Now of course, it does help that my living room has low light. But, it's better, right?

 I have made my first foray in to the world of breadmaking, and it's been a success!
 I'm even going to tell you how I did it, because I'm all generous like that.
 Ok, so this is where it gets a little creative, because I've never done this before. After looking up some recipes for this stuff, I determined that I wanted to use the bread recipe I had tried and liked, and then just experiment with the raisin-cinnamon aspect.
 Alright, so then it beeped, and I removed the dough and rolled it out to around 10" by 16".
 The most scrumptious cinnamon-raisin bread I've ever had!
 "Noooo, don't eat me!"